Holiday Centrepiece DIY

I’ve been thinking a lot about the things this year has taught me (more on that in a later post). One of the things that stood out was separating from the immediacy of getting things I need or want whenever I want. We live downtown Toronto where I can walk or drive to get most things in a matter of minutes. It took a good few months to retrain my brain not to think I could just “run out” anymore. We’ve been living at our cottage since March and try to shop seldomly, only going in to town for essentials. We also can’t get deliveries out here so if I do shop online it goes to our PO in town that’s a 20 min drive away. Because of this I became forced to make due with what was under our roof. Meals got creative based on what we had. Activities, games and crafts for Bea were made up with what was here. So, when it came to wanting to add a little more to our holiday décor, I decided to look around at what we had in our shed and just outside the door.
I can’t take full credit for the idea because one of our wonderful neighbours up here gave me something similar. I loved it so much I was immediately inspired to make my own with things I had around the house (mostly)! Simple, beautiful (I think) and really fun to do.

What you’ll need:
Piece of wood cut to your desired length (mine is 27 inches)
Candles
Small finishing nails
Hammer
Pruners or scissors
Greenery of your choice (I used cedar and boxwood)
Hot glue gun
Any other accents you’d like to add (I’ve got some dried red flowers and pinecones on mine)
How I did it:

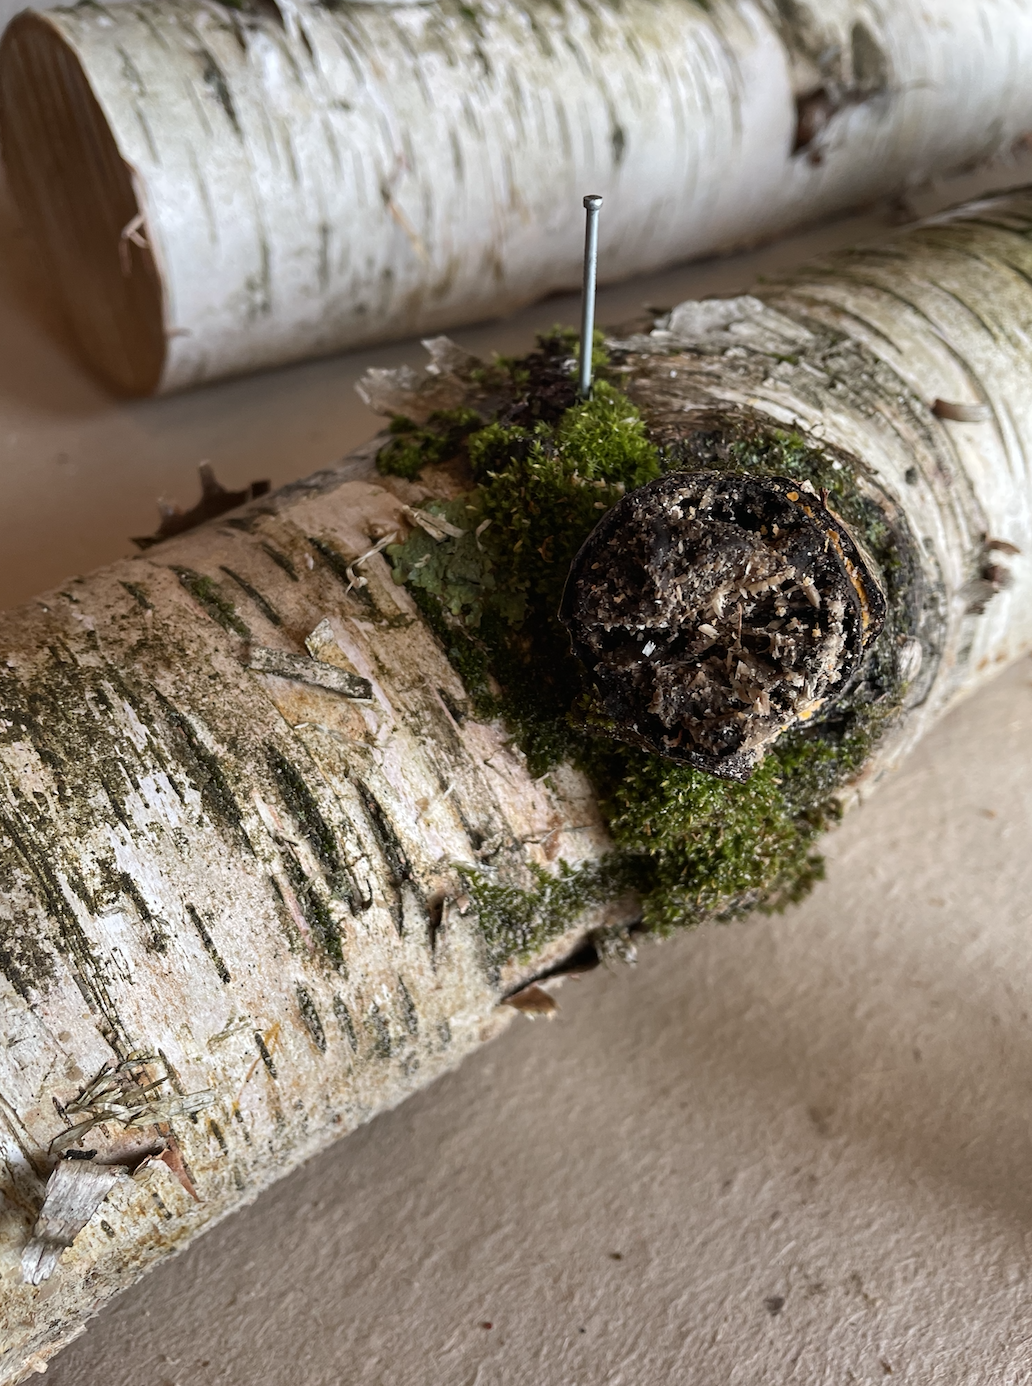
First things first find your piece of wood. I have two here because I plan to make another centrepiece for my Mom and Dad. I went with birch because it’s my favourite tree and the bark is so beautiful. For ours, I chose the piece with some built-in accents like the moss and the big knot. Next, skim off the bottom of your log to ensure it lays flat on the table. Rg did this with a chainsaw but advises it can also easily be done with a hatchet, axe or handsaw.
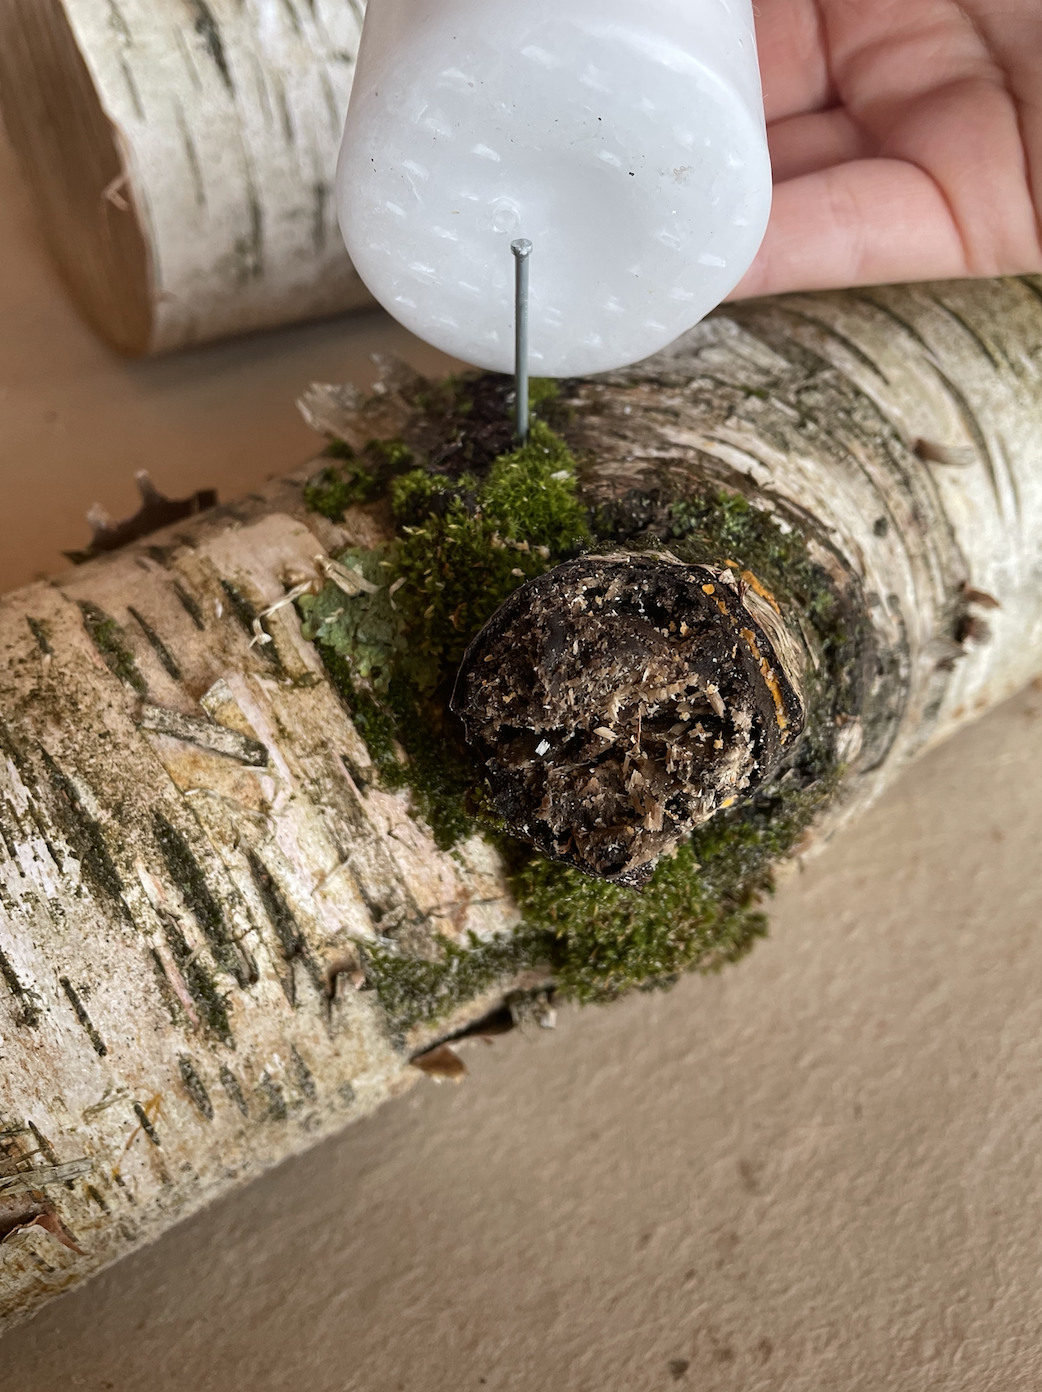
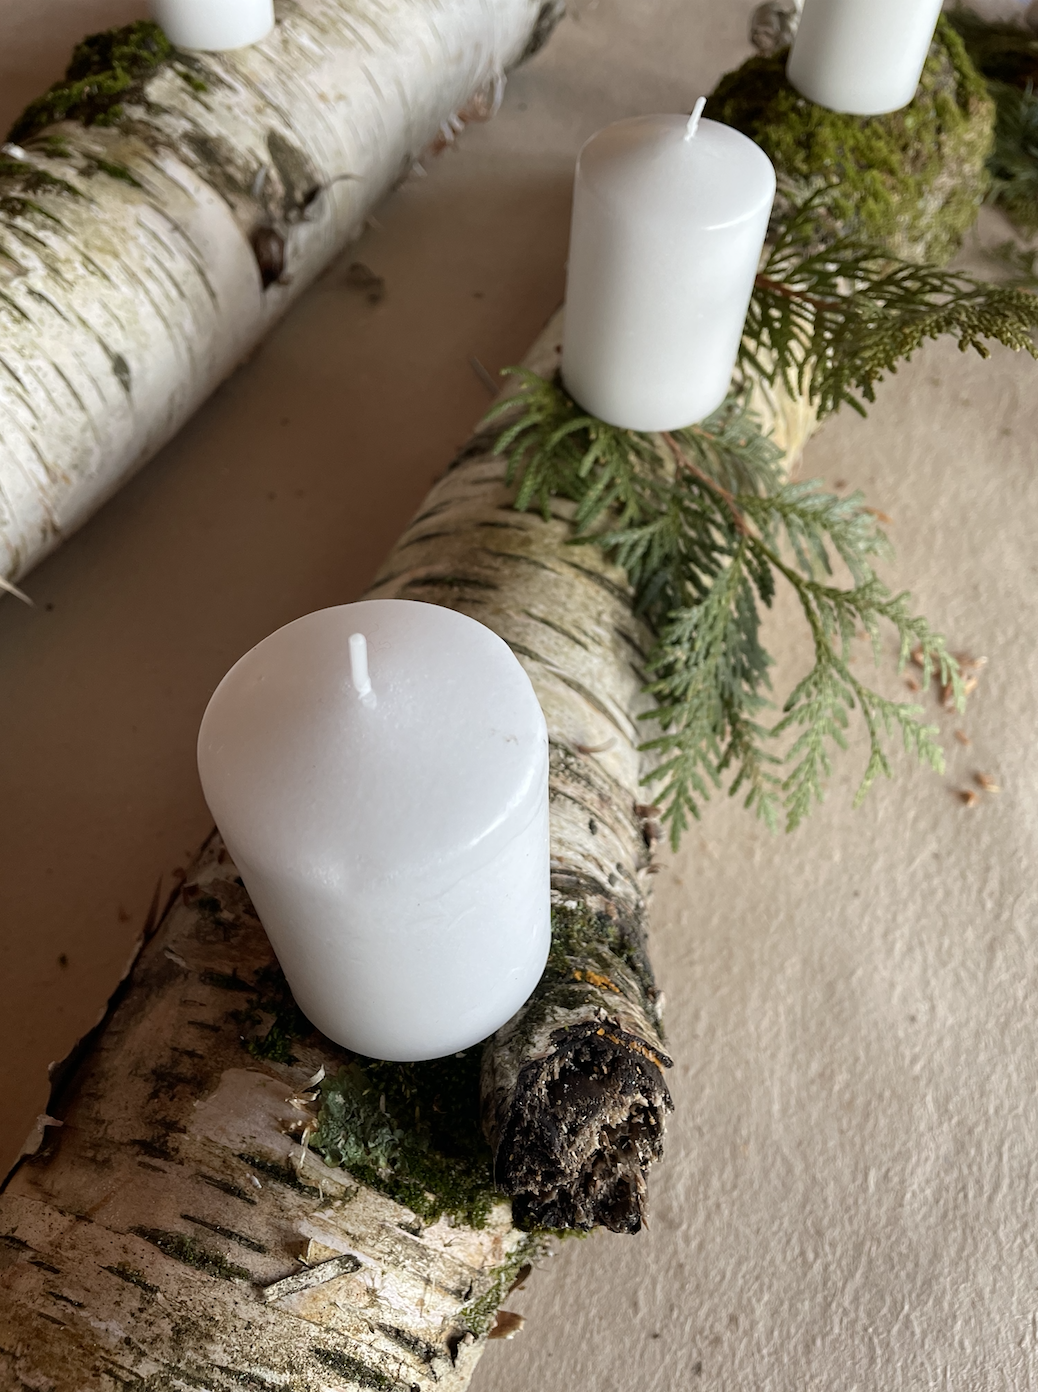
Next, I decided on where I wanted to place my candles and then hammered in small finishing nails to hold them in place. The candles I bought (the only thing I needed to get!) had little holes in the bottom already so they slid easily onto the nails.
Then get your glue gun fired up! I trimmed a few ends of branches from our cedar tree outside that had tiny little cones on them already. I started placing and gluing the cedar around the candles as the “base” for the rest of the arrangement. Then I added some dried boxwood. When I wanted a piece to pop up a bit, I simply made a small hole with a nail and the hammer on an angle and stuck the twig into it. Instant height!
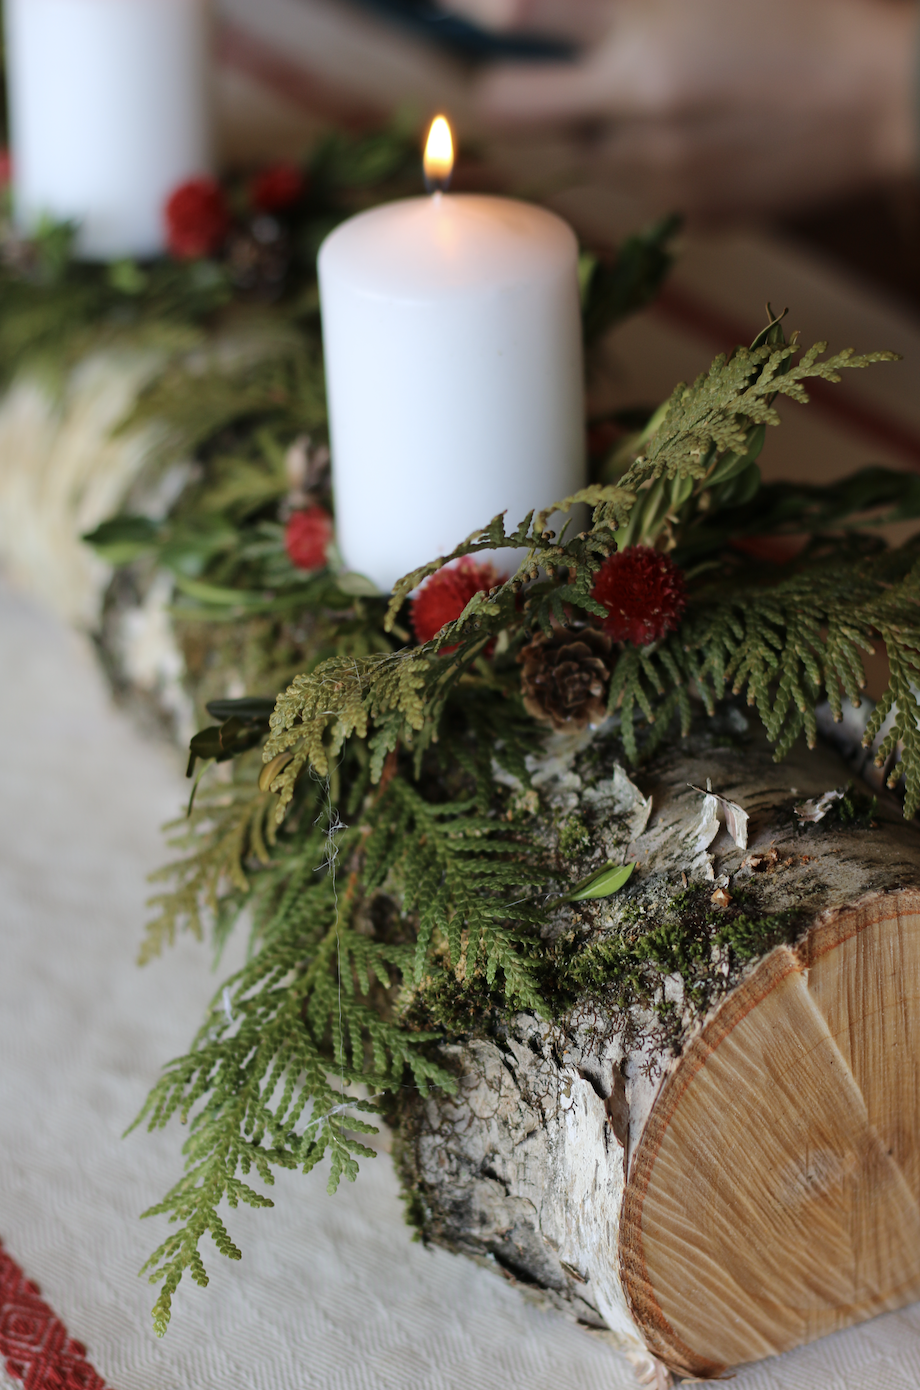

Once I was happy with the greenery placement I moved on to the little accents. My soon-to-be-sister-in-law, Camille, had given me some dried red flowers she picked up at farmer’s market. I think they add the perfect pop of colour. I had some small pinecones here in my holiday bin and glued some of those on for some different texture.
And that was it! I loved every minute of making this piece so much that I think it will become a new tradition for me. A great reminder of how rewarding it can be to make something yourself and how sometimes the most beautiful things are things you dream up. If you make one, tag me so I can see it!
Big love,
Danielle