Rice Krispies* Virtual Holiday Workshop with The Family Graham!

As a kid, some of my favourite memories of the holidays involved making treats with my Mom. She was always in a festive apron. I snacked away on all of the ingredients. I still remember the sound of her rolling pin the first time I got to use it. Making those memories with Bea (and one day Marigold) has been so special for me.
That’s why I’m really excited to partner with Kellogg’s* Rice Krispies* this holiday season, because I truly believe the best memories are rooted in the simple things. So I’m going to show you some great ways to get creative using Rice Krispies* Holiday Cereal and Cereal Bars!
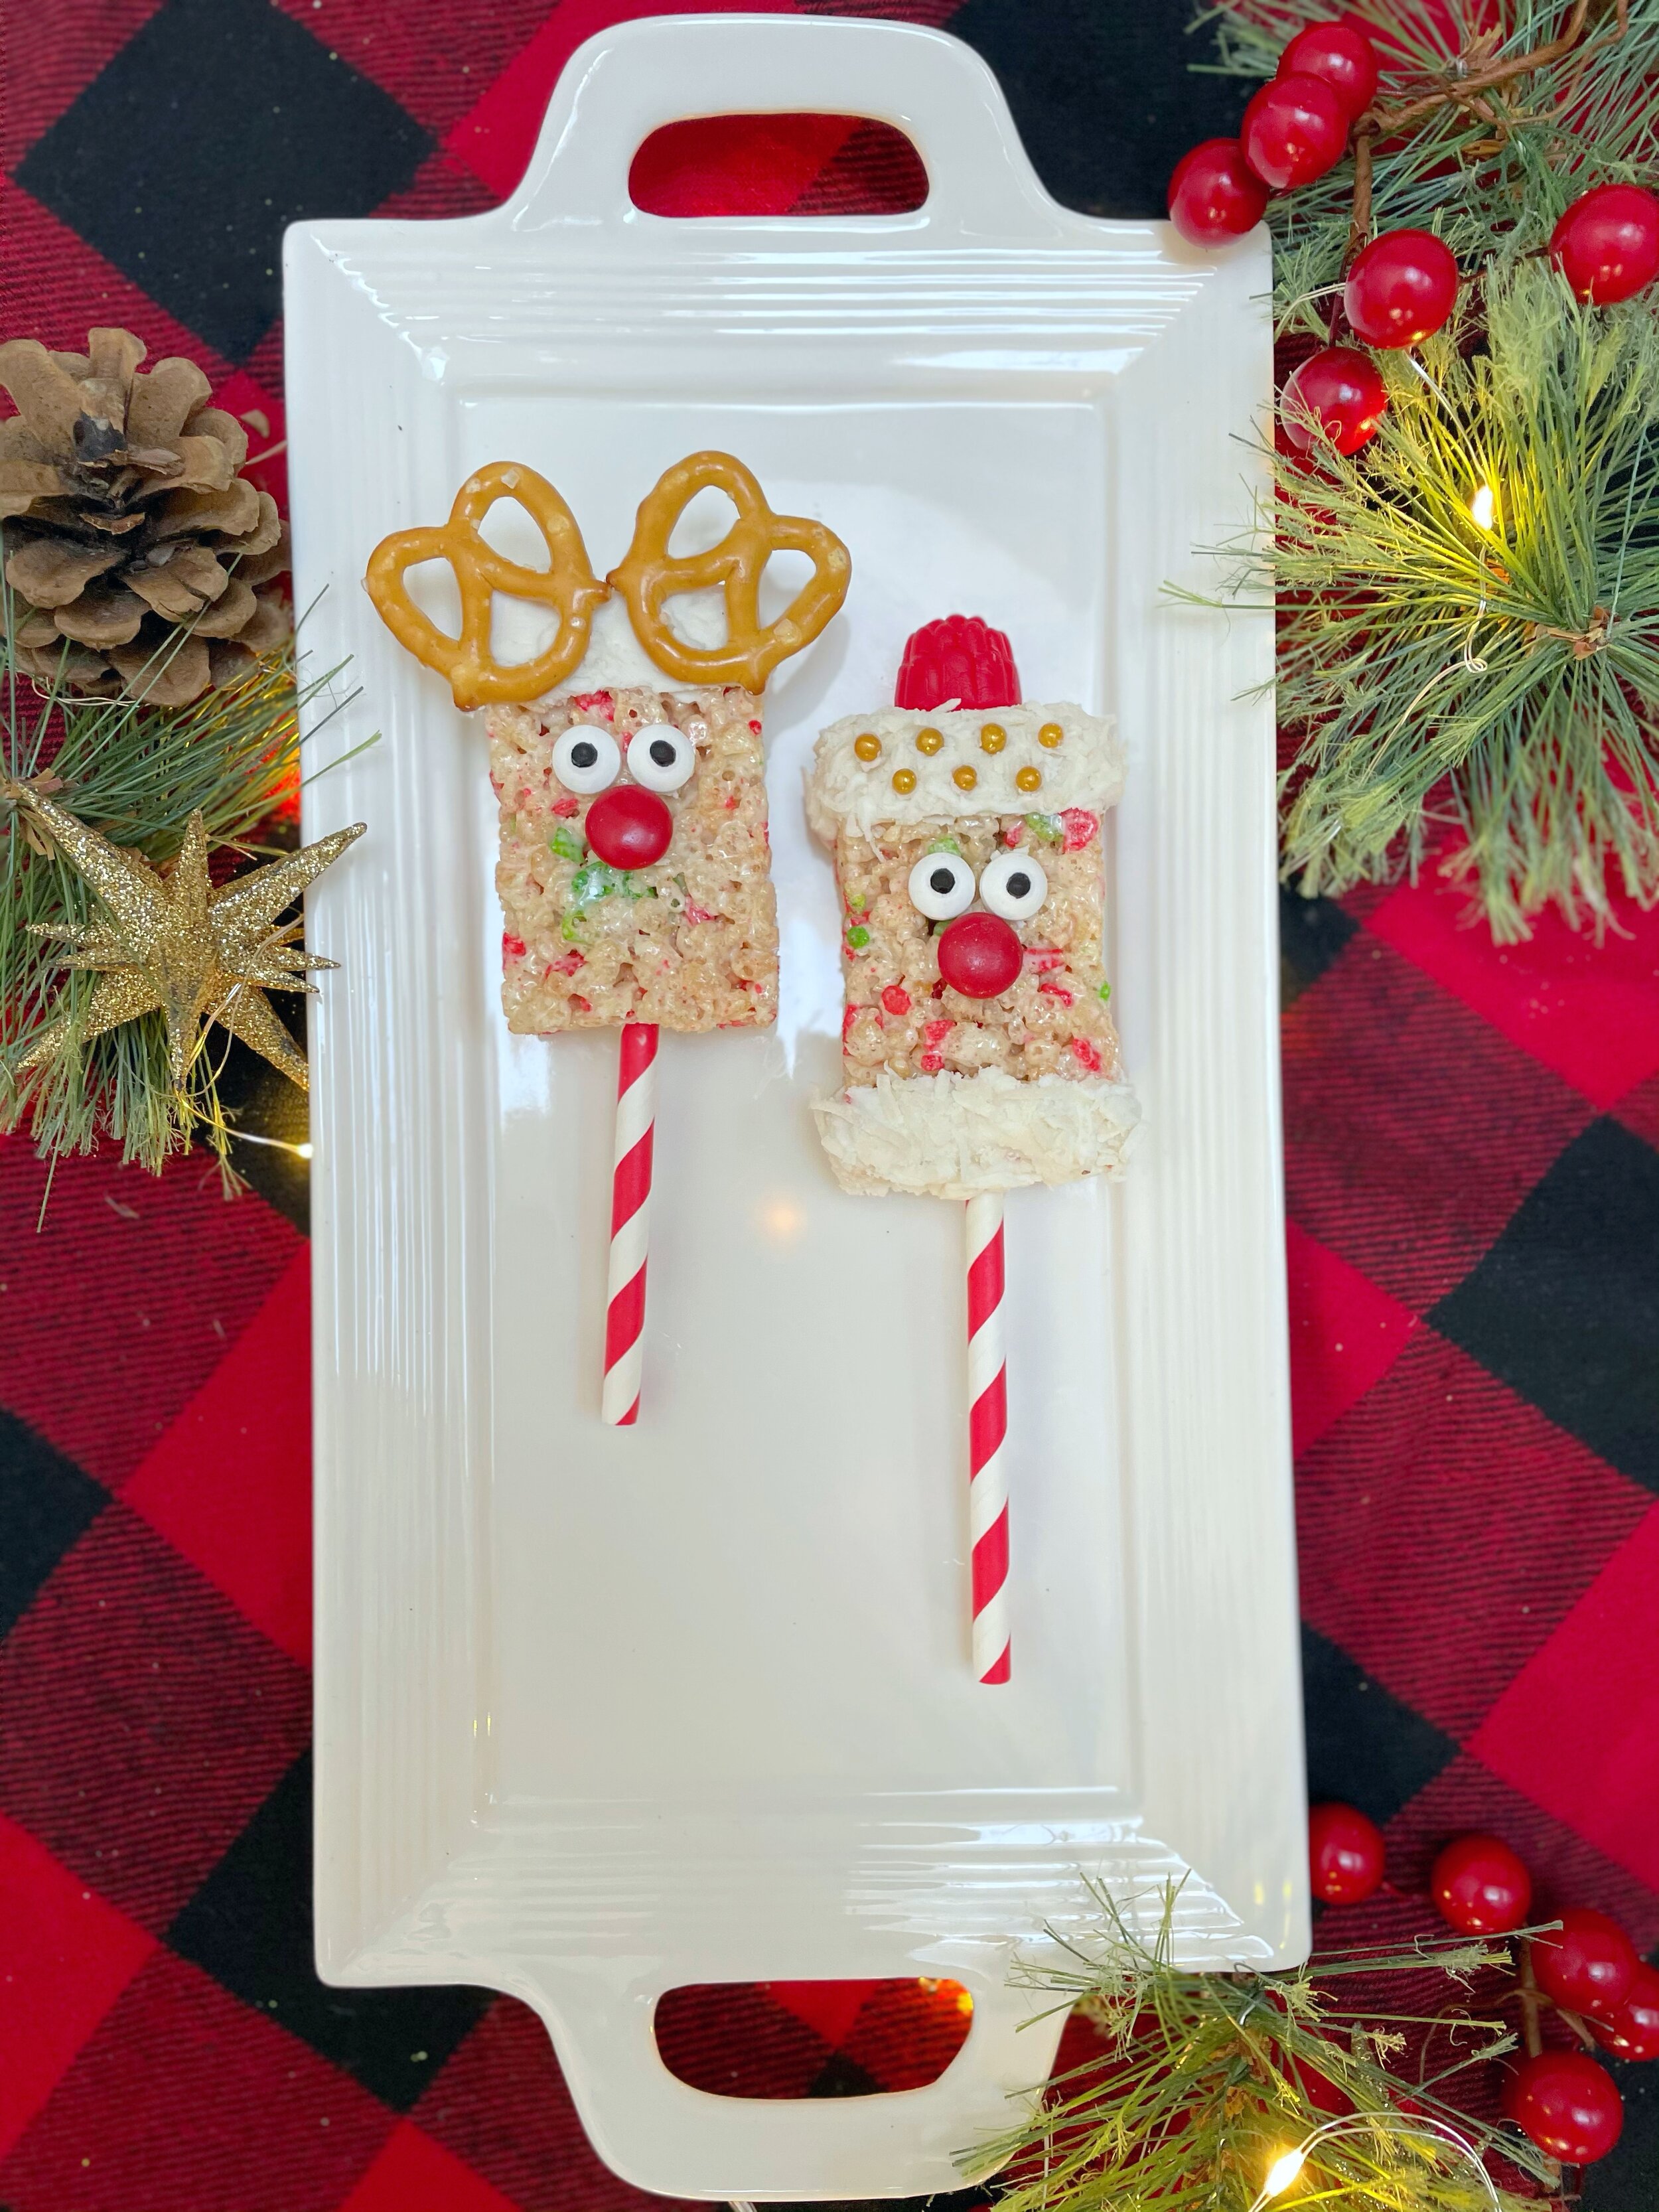
First up, SANTA AND HIS REINDEER!
Decoration Ingredients:
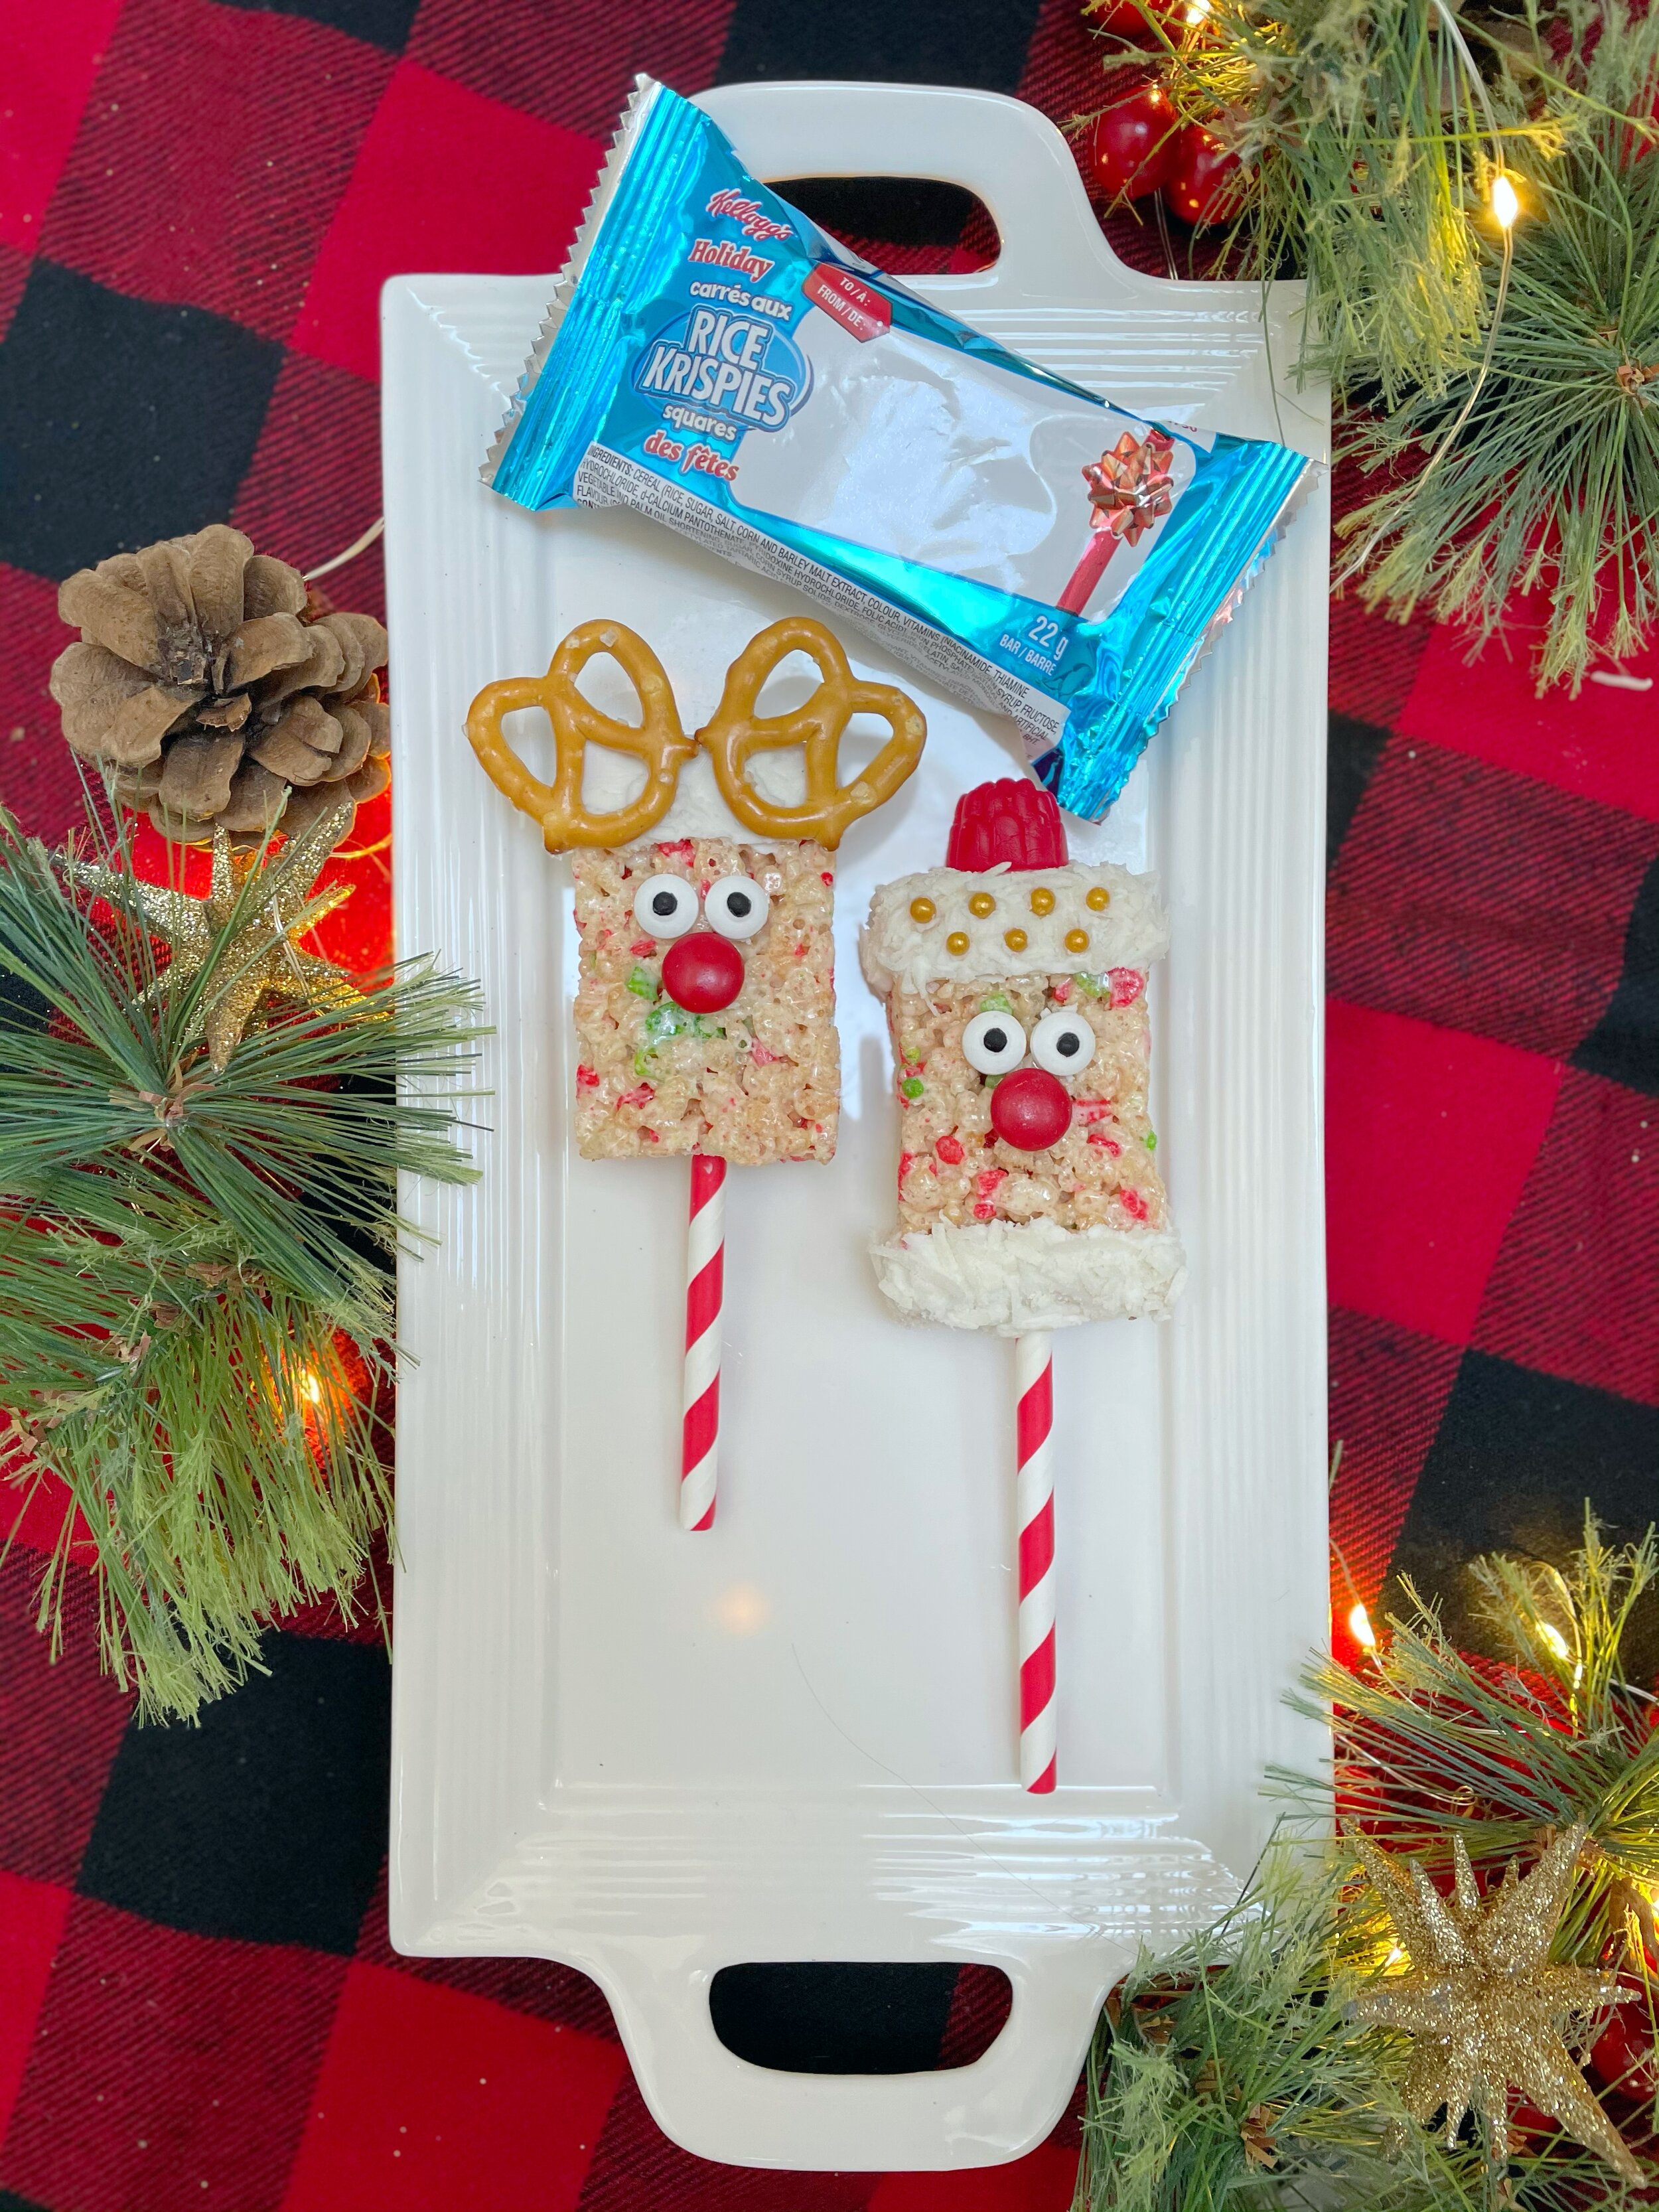
Rice Krispies Squares* Holiday Cereal Bars
White icing (the store-bought kind works great!)
Small pretzels
Shredded coconut
Candy eyes
Small candy-covered chocolates
Jujubes
Festive paper drinking straws
Sprinkles (optional)
Santa Instructions:
Open package of Rice Krispies Squares* Holiday Cereal Bars.
Spread icing on the top part of square (Santa’s ‘hair’).
Dip into small bowl of shredded coconut. Press down a little to make sure it sticks.
Add a small dab of icing to the back of the candy eyes and red candy-covered chocolate for his nose.
Place those on to the bar to make his face.
Spread icing on bottom part of square (Santa’s ‘beard’).
Dip back into the small bowl of shredded coconut, pressing down again if needed.
Cut one festive paper drinking straw in half.
Poke the straw into the bottom of the square.
Place a dab of icing on the bottom of a red jujube (hat) and place on top of Santa’s head!
Optional: add small candy gold balls or sprinkles to the rim of Santa’s hat.
Reindeer Instructions:
Open package of Rice Krispies Squares* Holiday Cereal Bars.
Spread icing on the top of the square.
Place small pretzels on top of icing, at the front.
Put a dab of icing on the back of the candy eyes and the red candy-covered chocolate nose.
Place those on the square as the reindeer’s face.
Cut a paper drinking straw in half.
Push the straw into the bottom of the square.
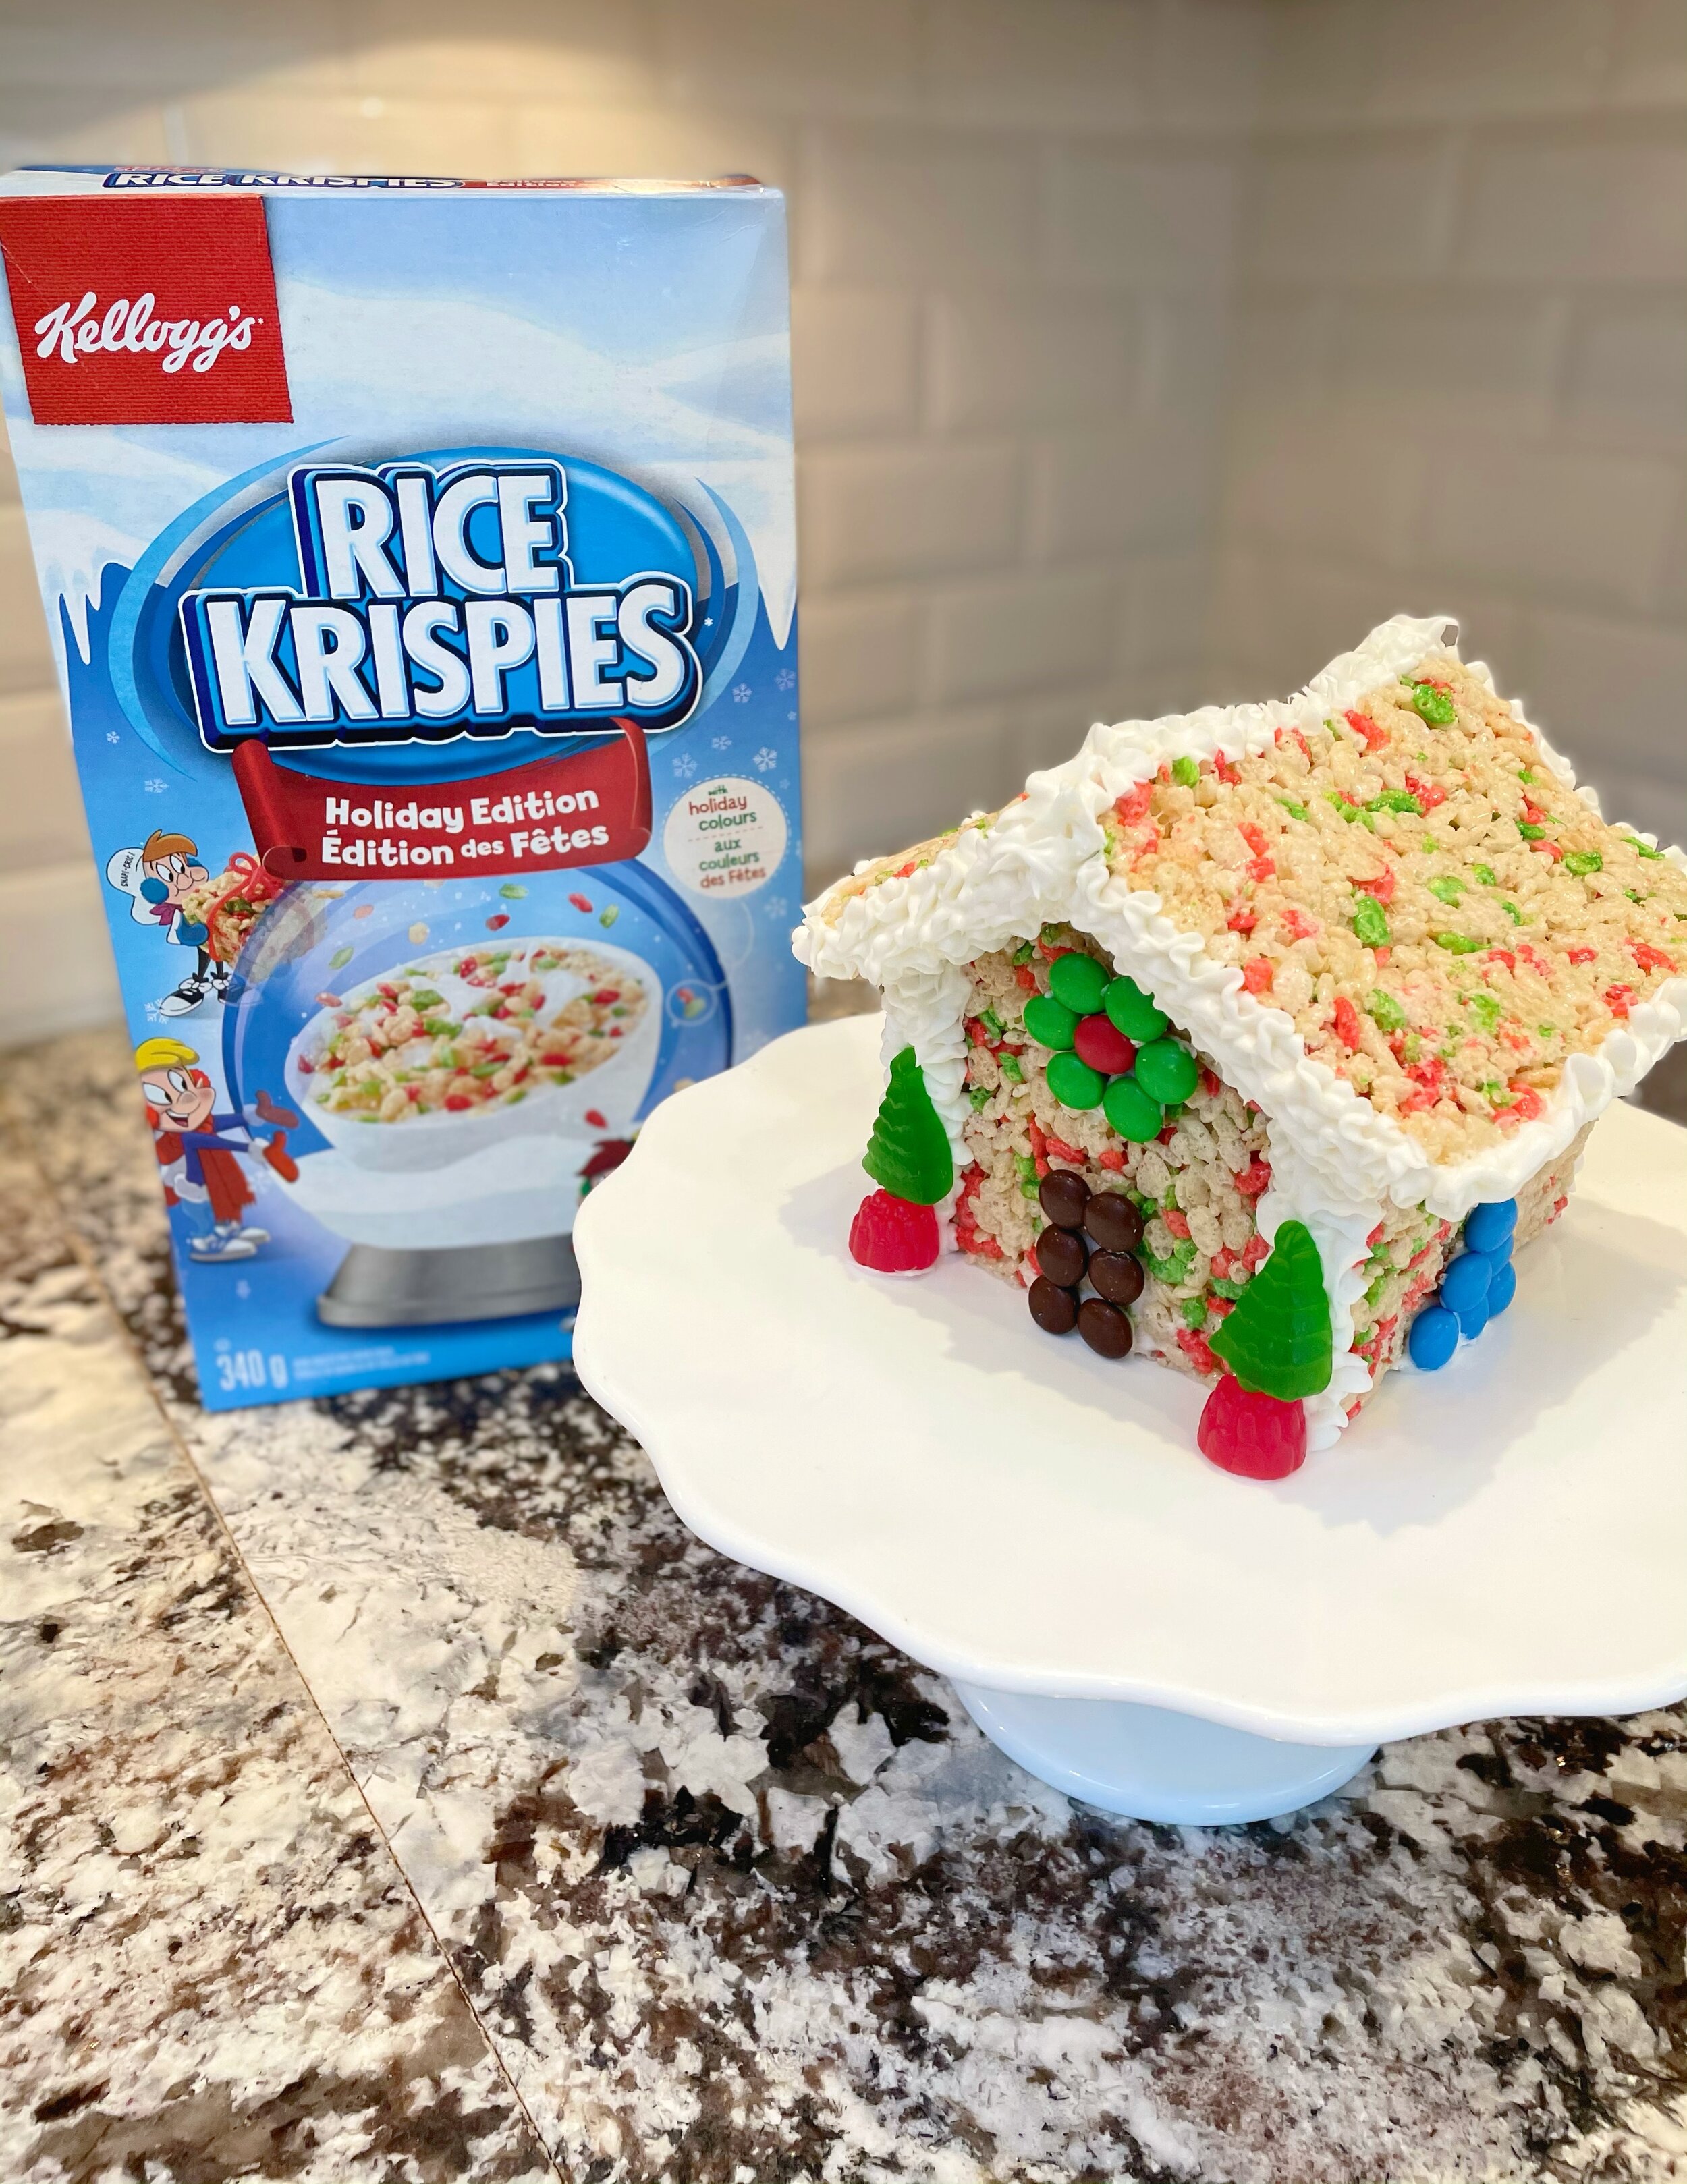
Now time for our favourite! THE RICE KRISPIES* HOLIDAY COTTAGE!
We’ve been spending lots of time at our cottage this year, so it only made sense for us to make a cute holiday version, made with Rice Krispies* Holiday Cereal for an extra festive feel!
This recipe is a lot of fun but requires a little bit of prep/cooling time before you can decorate. The base is made with your traditional Rice Krispies* squares recipe, but I've added some more Rice Krispies* cereal to make it a bit drier and easier to work with.
Ingredients for the Rice Krispies* Cottage:
8 cups Rice Krispies* Cereal (I added an extra cup and a half to the recipe for a little more stiffness)
250 g package or 40 regular size marshmallows
1/4 cup butter
Dash of vanilla extract
Decoration Ingredients:
White icing (again, the store-bought kind works great!)
Piping bag with tip (I use a flower tip because I find it very forgiving and I love the icicle effect it gives)
OR, you can also simply fill a plastic storage bag and cut a small corner off the end and use that to ice if you don’t have the icing tips.
Red/green/blue candy-covered chocolate (the same ones we used for the reindeer and Santa treats)
Green candy trees
Jujubes (also used for the Santa and Reindeer treats)
Whatever else you choose to decorate with or have around the house! Get creative and have fun!
Directions:
I find the cottage holds best if you make the squares and cut the pieces the night before to let them firm up.
The night before you plan to decorate, prepare the Rice Krispies* squares as directed on the box (REMINDER: I add that extra cup and a half for added stiffness). Spread the mixture over 2 pans (9.5”x13.5” and an 8”x11” is what I used). You want to spread out the mixture thinner than you would if you were making the squares, less than one inch thick.
Allow to cool completely.
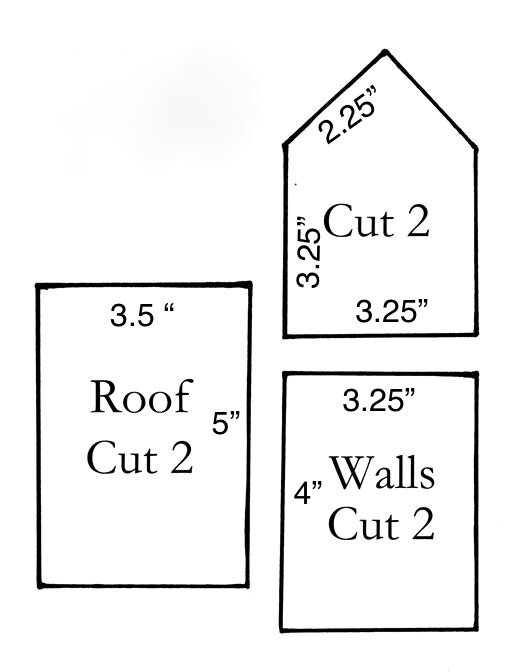
Print the pattern (below) on a standard 8.5”x11” sheet of paper. Cut out the pieces and place them on top of your pans of Rice Krispies* squares mixture. Using a knife, follow the pattern to cut two (2) of the walls, two (2) of the front pieces with the triangle peak, and two (2) roof pieces. You’ll end up with 6 pieces (2 of each total). Leave them on a cutting board on the counter overnight to firm up.
Decoration time!
Take one of the front pieces and stand it up on your cutting board or plate.
Then, take the right wall piece and place it on the outside edge of the front piece.
Place the left wall on the outside edge of the front piece.
Take the second front piece and place it in the middle of the 2 wall pieces at the back. The ooey gooey goodness of the Rice Krispies* mixture acts as a glue to help hold all the pieces together. You can secure the walls with a few toothpicks inserted in the edge of the walls and pushed into the front pieces, if needed.
Now it’s time to place the roof! Same as the walls, place the right side then the left. Don’t be afraid to press and manipulate the pieces to help them stick and fit well together!
Fill your icing bag. You can use either a simple storage bag, fill it with the white icing and cut a tiny corner of the end. Or, you can use a piping bag with any tip you like. I chose a floral tip because I find it very forgiving and it creates a nice snow/icicle effect.
Add icing along the roof where the left and right pieces connect.
Ice along the front ridges of the roof as well.
I also iced along the edges where the front and wall pieces connect.
Add candy and whatever decorations you like!
Wishing you all a wonderful and delicious holiday!
Danielle
*© 2020, Trademark of Kellogg Company used under license by Kellogg Canada Inc.